How to use Brackets Text Editor
Brackets code editor is very easy to work with. If you have some experience of using the basic text editors like Notepad++, then you will be able to use Brackets without any issue.
But, if you are complete beginner or you want to master Brackets from a basic to expert level, then you are at the right place.
After installing the Brackets, the first screen is the “Getting started” screen as below –
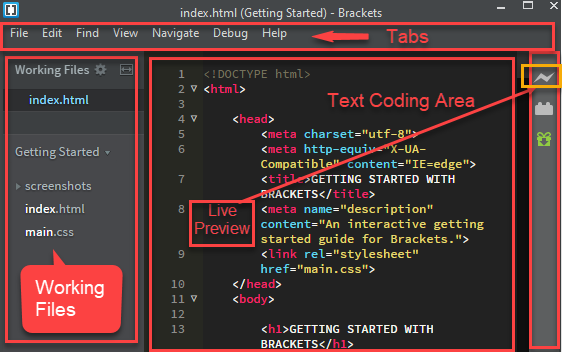
The main screen will be divided into 4 parts/sections-
- Tabs – This is present at the top. It is the menu bar which contains options like File, Edit, Find, etc.
- Working Files Section(Sidebar) – This shows all the files including the active file.
- Text Coding Area – Area where you will write your code.
- Live Preview & Extensions – The “Live preview” is a great feature and we will discuss about it in detail as you move further. The Extension Manager contains the Extensions and themes for the Brackets.
On Top level, it has these tabs-
- File – To perform File related operations.
- Edit – Operations related to modifying the file.
- Find – To find & replace a text or pattern.
- View – To control how to view the file.
- Navigate – Options to navigate from one place to another.
- Debug – This has options to debug the tool.
- Help – Provides Help manual and support for the tool.
Let’s master each of these tabs one by one-
How to Sort files in Working Files Section
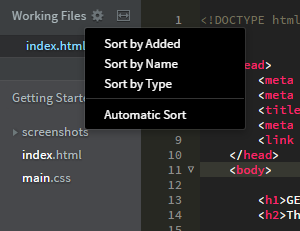
You can sort the Files based on –
- When they were added
- Name
- Type
- Automatically sort
Another way is to drag a particular file towards top or bottom.
Section at the bottom of the Editor

- Space/Tabs – This specifies if the formatting is space or tab. Even the number of space/tabs can be edited which is at the bottom right.
- Type – Type of Files can be HTML, JavaScript, CSS etc.
- Character Encoding – The preferred encoding for HTML is UTF-8
- INS/OVR – By default, it is INS which means that the code will be inserted. OVR means the code will overwrite.

File status symbol – This specifies if the code is Ok or any error or warning shoud be displayed
In the above image, the yellow triangle shows that there is some issue with the code. It is an error.
The actual error is shown above. You can toggle the error once you click on the yellow triangle.
If there will be no errors in the code, there will be a circle(with green tick) in place of yellow triangle.
File Menu
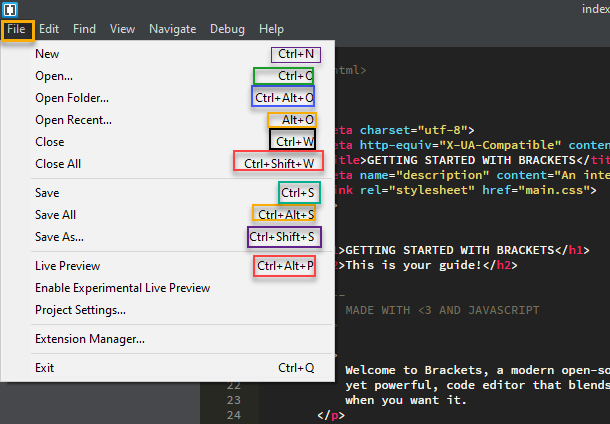
The sub-menus which are present in almost all the text editors like – New, Open, Open Folder, Open Recent, Close, Close All, Save, Save All, Save As and Exit.
But the important sub-menus which makes Brackets different from other Code editors are –
- Live Preview – Click here to learn this in detail.
- Enable Experimental Live Preview
- Project Settings
- Extension Manager
Of Course, some of the text editors do have the above features as well but the Live Preview feature of Brackets is one of the best one.
We will discuss all these 4 sub-menus in detail as we move further in this tutorial.
Tips:
To Open a Folder/Project, there are 4 ways-
Method 1:
Go to File -> Open Folder
Method 2:
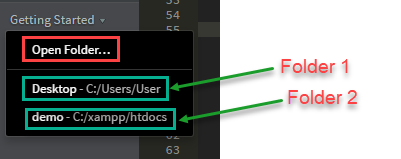
Click on “Getting Started” which is present just below the “Working Files” Section. Either click on “Open Folder” or choose the Folder from the List. This is the best option.
Method 3:
Using Keyboard shortcut –
– Ctrl + Alt + R (On Windows).
– Cmd + Alt + R (On Mac).
Method 4:
Drag the particular Folder to the “Getting Started” window.
Managing Files in Brackets
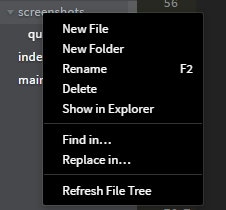
Right Click anywhere under the “Getting Started” windows and there are options to –
- Create a New File
- Create a New Folder
- Rename a File/Folder – Shortcut is F2
- Delete a File/Folder
- Show in Explorer – To open the path explorer for files/Folder in PC or Mac
- Find in… – To Find a text or string or pattern in the File
- Replace in… – To Find a text or string or pattern in the File and replace it with another string
- Refresh File Tree – To refresh the file tree
Previewing Images in Brackets
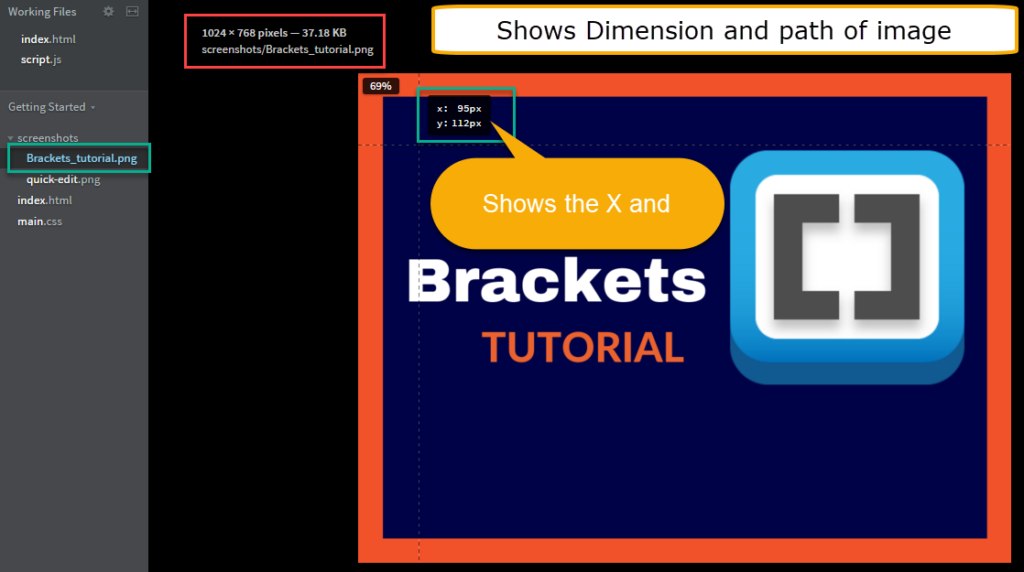
This is one of the best feature of Brackets. Brackets allows you to preview the image directly within Brackets without going to actual location of image and previewing it.
You can also see –
- Path of the Image
- Actual dimension in Pixels
- Cross Hair cursor
- X and Y coordinates of the cursor
Edit Menu
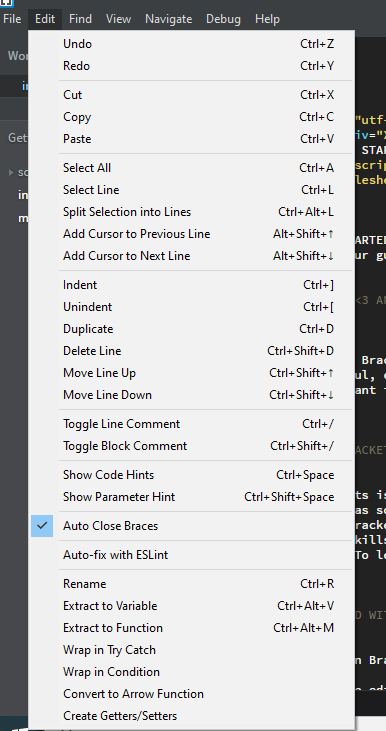
Apart from the normal sub-menus which is present in most of the text editors, there are some options which are some great features of Brackets.
These options are –
- Show Code Hints – This shows the Code hints while typing
- Show Parameter Hints – To show Parameter related hints while typing
- Auto Close Braces – By default, this option is checked. This helps to automatically insert the close braces for every opening brace.
- Convert to Arrow Function – We will discuss this as we move forward.
Find Menu
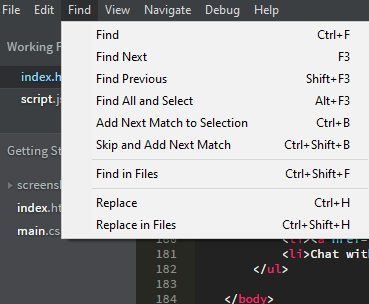
These are normal options which are self explanatory and are present in most of the text editors.
View Menu
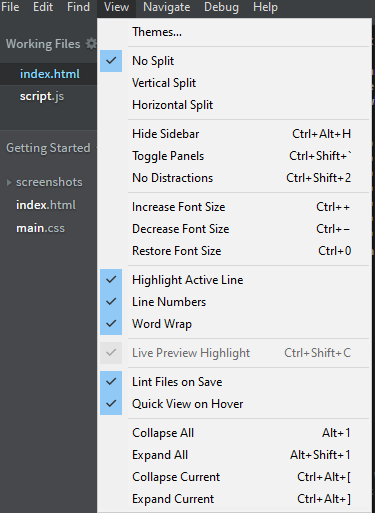
The Themes contains 3 themes at this moment. This can change in future. These inbuilt themes are –
- Brackets Dark
- Brackets Light(Default)
- Monokai
If you do not like these themes, you can go to Themes under “Extensions” and select the one which you like. The Extension Manager is present under the “File” menu or it is present at the right side of the tool.
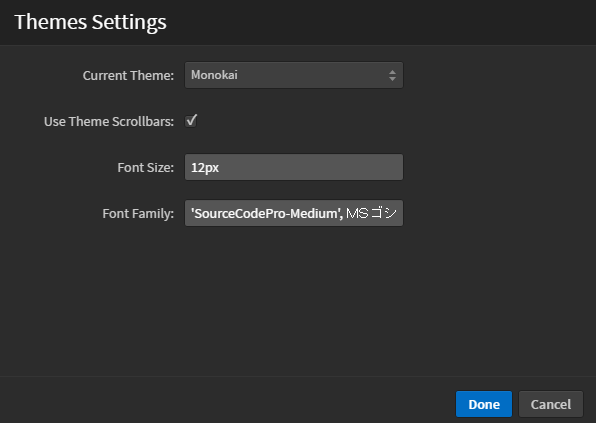
You can change the Theme, Font size or Font Family from this window.
By default, all the important features are checked like Highlight Active Line, Line Numbers, Word Wrap, Lint Files on Save, Quick View on Hover, split No split, etc.
It is better to leave that as it is until really needed.
Lint Files on Save – It shows any Linting errors. For Example – If you are using JavaScript, then it detects Linting errors and displays them.
How to customize the Work-space?
If you do not like the default font size, you can increase the font size easily by using any one of these methods-
- Using mouse:
View -> Increase Font Size – To increase the Font size
View -> Decrease Font Size – To decrease the Font size - Using keyboard shortcut:
Ctrl++ : Increase Font Size – To increase the Font size
Ctrl— : Decrease Font Size – To decrease the Font size
By default, the word wrap and Line Numbers will be checked. If you do not like it, you can unchecked it anytime by going to the View Menu. But, we recommend to keep them on.
We recommend to turn on the “Highlight active Line” from the View menu so that you will be clearly aware that you are in a particular line of the code.
Sidebar is shown by default, if you want to hide the sidebar, you can follow any one of the below –
- Using mouse:
View -> Hide Sidebar - Using keyboard shortcut:
Ctrl+Alt+H
Navigate Menu
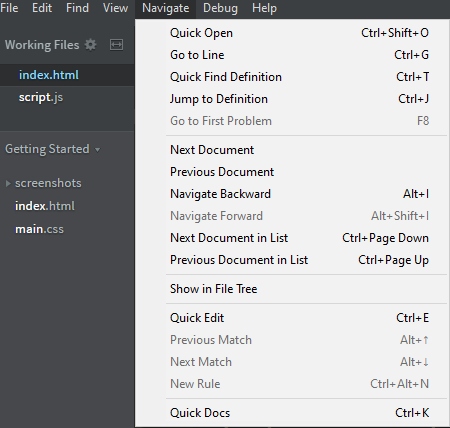
The Navigate Menu contains some options which are also present in most of the Text editors like Go to Line, Quick Find Definition, Jump to Definition, Next Document, Previous Document, Next Document in List, Previous Document in List, Show in File Tree, etc.
The important options which are not present in most of the other editors at this point of time are –
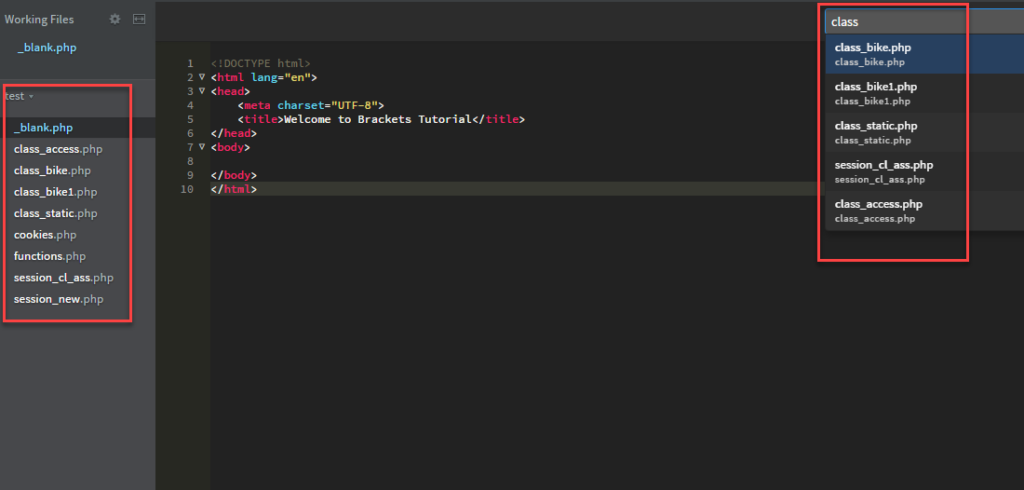
- Quick Open – To quickly open a file directly from the work-space. This is a very good option and the shortcut is Ctrl+Shift+O. You should use this shortcut to save time and effort.
- Quick Edit – This is one of the best feature of Brackets code editor. We will discuss about this feature separately as a new topic.
- Quick Docs – This is also a great feature especially if you do not have a good knowledge about a particular HTMl tag, element, CSS, etc.
Debug Menu
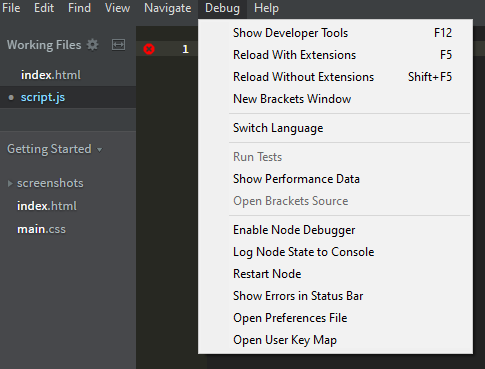
The Debug menu helps to fix any errors. We will have a separate lesson about this option.
The important options are –
- Show Developer Tools
- Reload With Extensions
- Reload Without Extensions
- Open Preferences File
- Open User Key Map
Help Menu
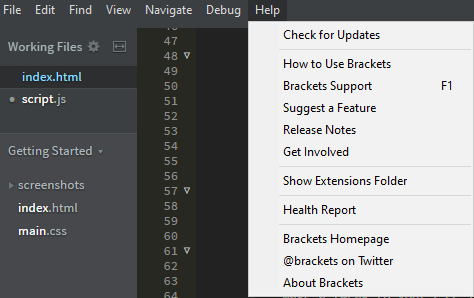
Finally, the Help menu is the place where you can check for any updates.
This has an option which shows on how to use Brackets.
If you press F1 in your keyboard, it will open the Github’s Bracket Wiki Link for Troubleshooting.
Once you click on the “Show Extensions Folder“, it will open the folder where extensions folder.