Add Background Audio
If you are here to learn, how to add background audio to captivate slides then you are at the right place.
Let’s see how to add background audio.
To add audio as background to the slides, you should store the audio file ready in the local drive.
- Open the required Captivate project.
- Go to the Audio dropdown menu and Select Import to.
- Choose Background option as required to add audio as background.
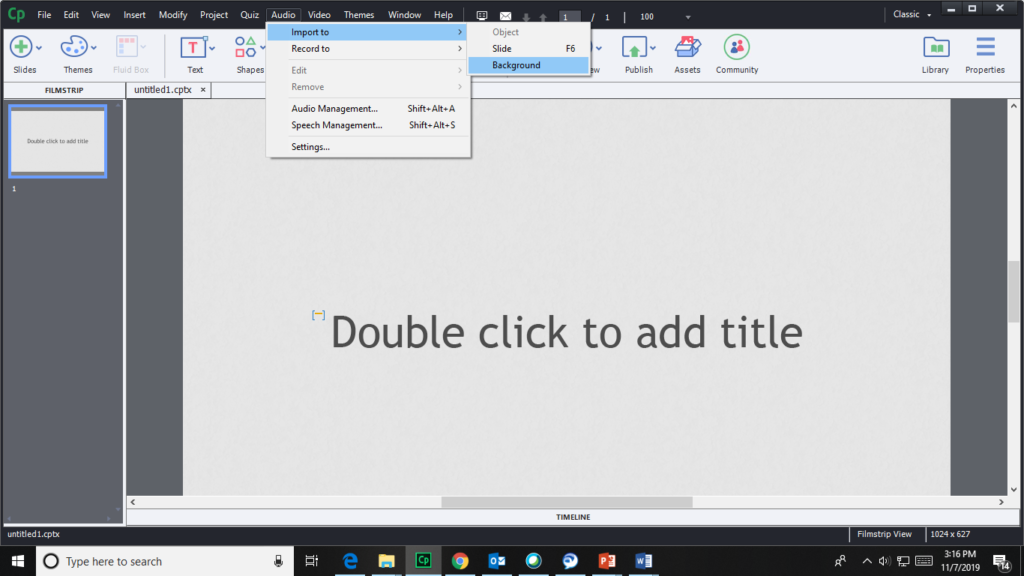
Then, a pop up appears where you must browse your PC for adding audio.
After adding the audio, it opens a Background Audio window as shown below –
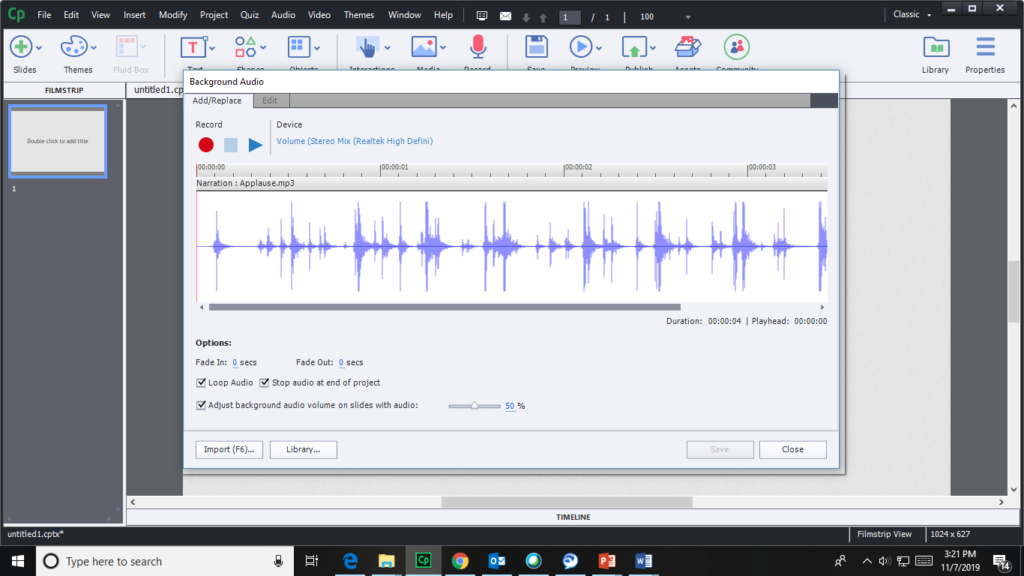
- You can find a Play button on the pop-up window to preview the audio.
- You can also adjust the volume as required.
- To adjust the volume of the audio, you can check the “Adjust background audio volume on slides with audio” then it enables for adjusting the volume bar as required.
- Drag the bar to a position for the required volume.
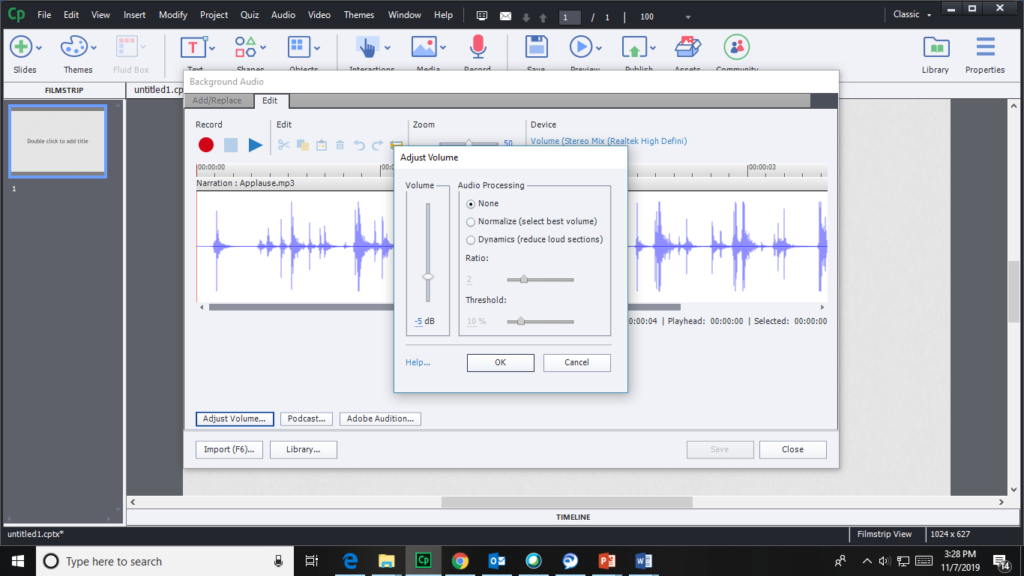
Bonus Tips
If you change the audio volume to -5db, it gives you clear and good audio.
- Use this window, to edit the audio by selecting different modes.
- Click OK to save the changes.
- To add another audio, click on the Import option and select the required file.
- In Add/Replace tab, you can apply the fade in and fade out effect to the audio. To apply this option for the required number of seconds use the Fade In and Fade Out
- You can loop the audio by checking the Loop
- You can stop the audio at the end of the project by checking the “Stop Audio at the End of the Project” checkbox.
- Click Save.
- To check the background audio, click on the Preview
- Select the Project which plays the slides.
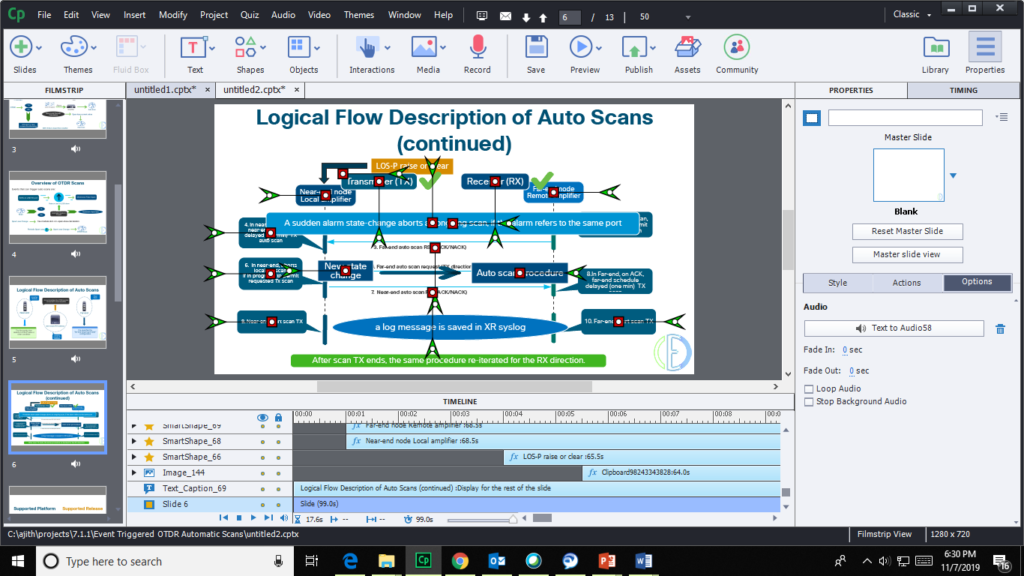
This adds background audio to the slides.
Add Audio for slides as Voice over
Here, you are going to see how to add text as voice over to a slide. It’s called Text-to-speech. This is useful when you are giving the audience a learning session for which you have content as text. You can use the text as the voiceover for a better understanding.
There are 2 ways to access –
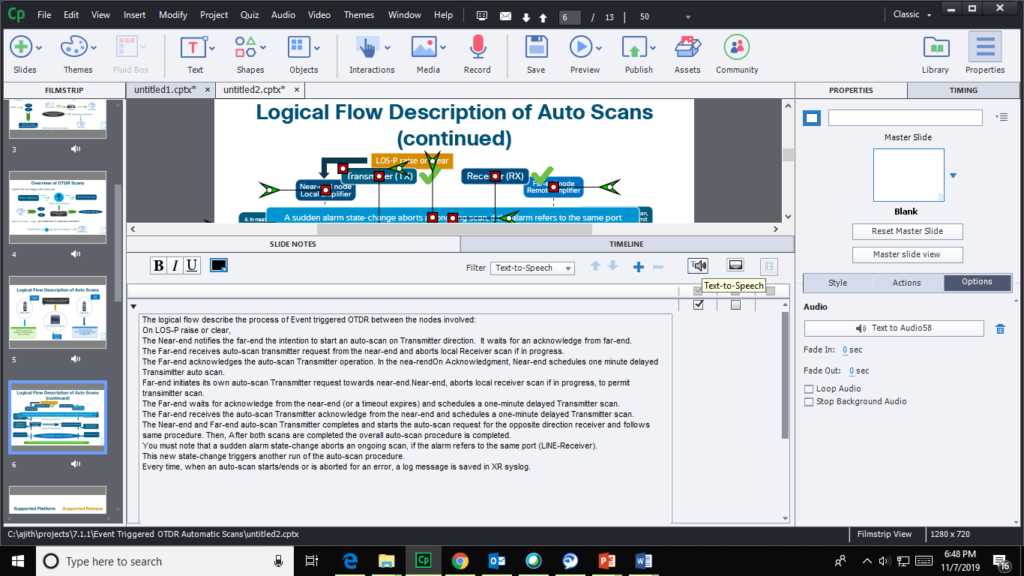
- Navigate to Window menu. select Slide Notes. Click on the Text-to-Speech. Check the next point to access in another way.
- The other way is navigating to the Audio menu. Select Speech Management.
The first one navigates to the following location as shown in the below image. Click on the Text-to-Speech icon where the cursor points out.
Then, a popup of the Speech Management window comes up where you can add text for the slide. If you follow the second way, then it opens the Speech Management window for all the slides.
Adobe Captivate offers you a wide range of Speech Agents. You can select any one of the speech agent as you required. To access the speech agents in the Speech Management window, click on the Speech Agent dropdown and Select the speech agent.
Now, enter the text content in the speech management window for the required slide. After entering the text, click on the Generate Audio button for generating the text as voice over. After it’s generated then click on the Close button.
If you want to verify whether the audio synchronized with the slide then navigate to the Window menu and click on the Timeline. Under the Timeline tab, you can see a Text to Audio item which has a wave graph. Click on the Text to Audio item to select it and click on the Play button to preview the voice over.
In the below image, you can see Text to Audio58 as an example-
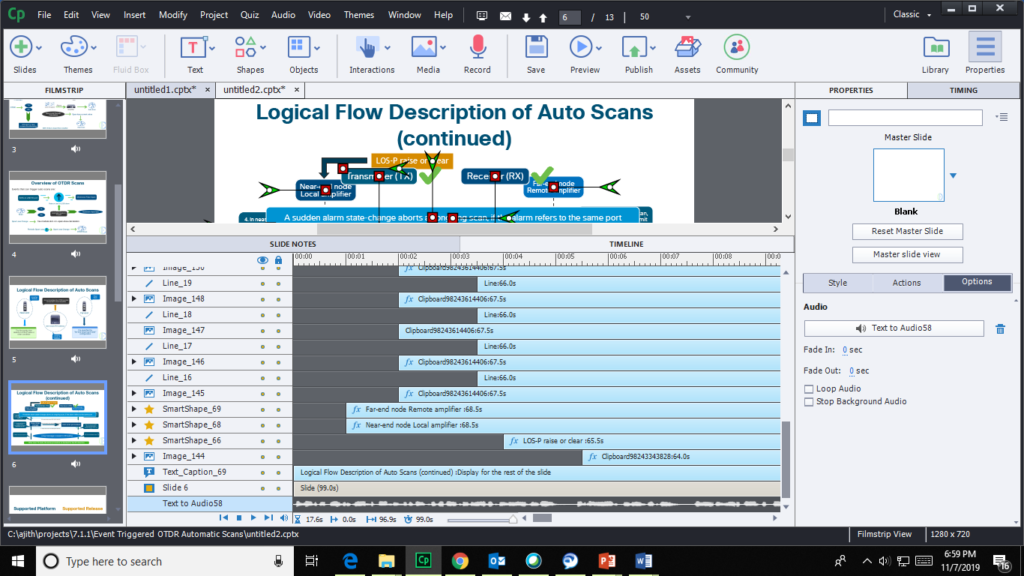
To preview the audio, click on the Play button shown in the above image.
Bonus Tips
- If you play the audio and you feel the audio is going fast then you can change the audio speed accordingly. To change the speed of audio at particular points, enter a fullstop in the sentence for a long pause and enter the comma for shorter pause by using speech management window. If you have an abbreviation, then make the text as capital and give space between each letter for pronouncing the each letter separately.
- If the above tip does not meet your requirements, then you have another option. You can do much more changes to the speech agent voice as required by using Neo speech. Adobe Captivate use an application called Neo Speech. This application also installs with the adobe captivate installation. To access the Neo speech application then follow the below paths for required system.
Path for the 32 bit is – Computer > Local Disk: C > Program files*86 > Adobe Captivate voices > VT > Speech Agent > VTEditor ENG
Path for the 64 bit is- Computer > Local Disk: C > Program files > Adobe Captivate Voices > VT > Speech Agent > VTEditor ENG
Open the VTEDITOR_ENG application. This is a text editor for text speech.
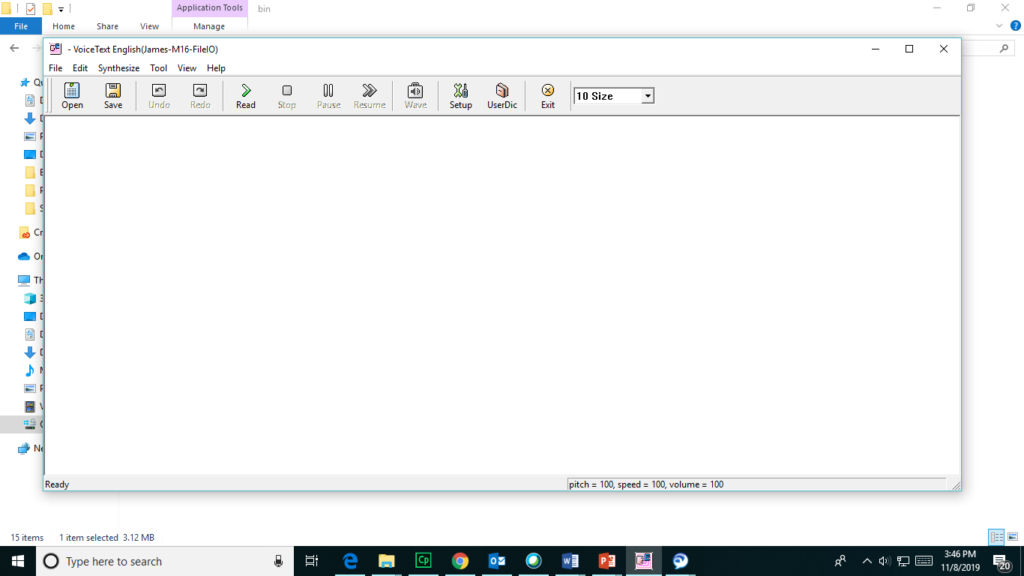
You can paste the text that you are using for audio.
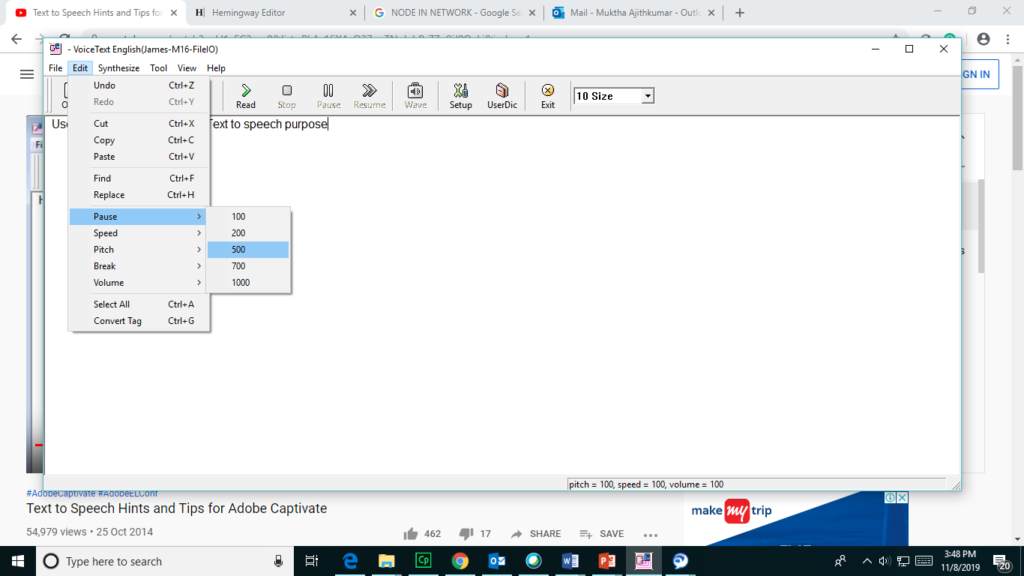
Go to Edit menu and select Pause for giving a pause in milliseconds. Select the required milliseconds as shown above. You can use Break option for more pause time. It offers three styles such as 0,1, and 2. Before you click on the Edit menu, place the cursor on required word to apply the changes.
You can change the speed of the voice by using Speed option. To change the speed of the voice, go to Edit menu and select Speed option which offers you a range from 95 to 150 in percentage wise. For example, if you select 110% then 10% of extra speed is added to regular speed.
You can use Volume option for adjusting the volume of the audio. You can use the Pitch option for adjusting the pitch of the voice. After you applying changes, if you want to preview it then click on the Read button.
Now copy this text and paste it in the Speech Management > Slide.
This offers you more natural voice than previous one.
Recording the Audio
Adobe Captivate offers to record your own voice for the slide or objects.
If you want to record the voice of a professional or own, then follow the below steps.
Let’s see how to record the voice for a slide.
- Select the required slide for recording the voice.
- Click on the Record icon located at the top.
- Opens a Slide Audio window.
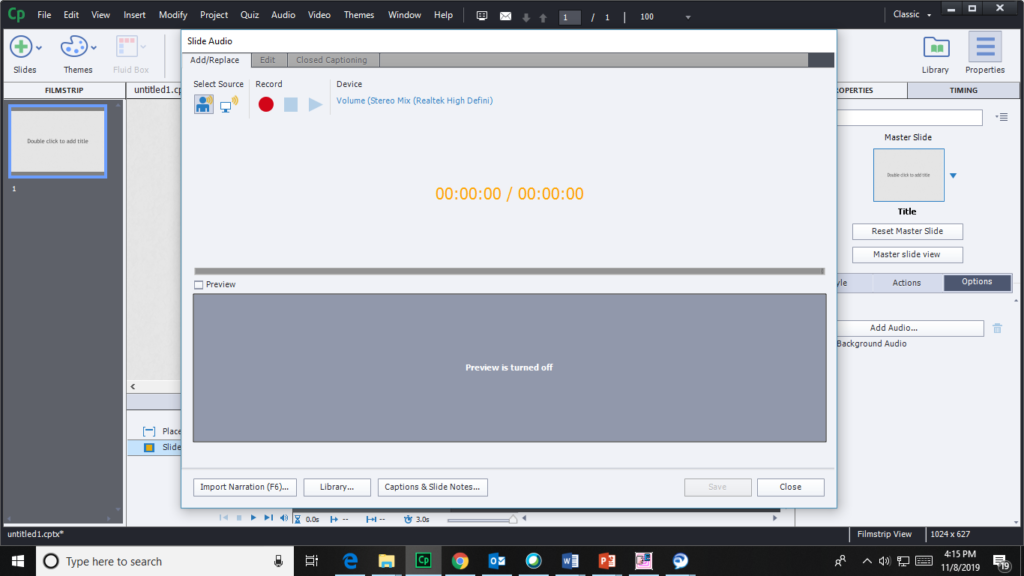
Click on the Record button. This opens a pop-up again – “Do you wish to calibrate audio input?” and I recommend you select- Yes.
Bonus Tips
Turn off the AC or Fan for a better audio.
- Then, a small window opens up which requests you to calibrate your voice by reading some default text.
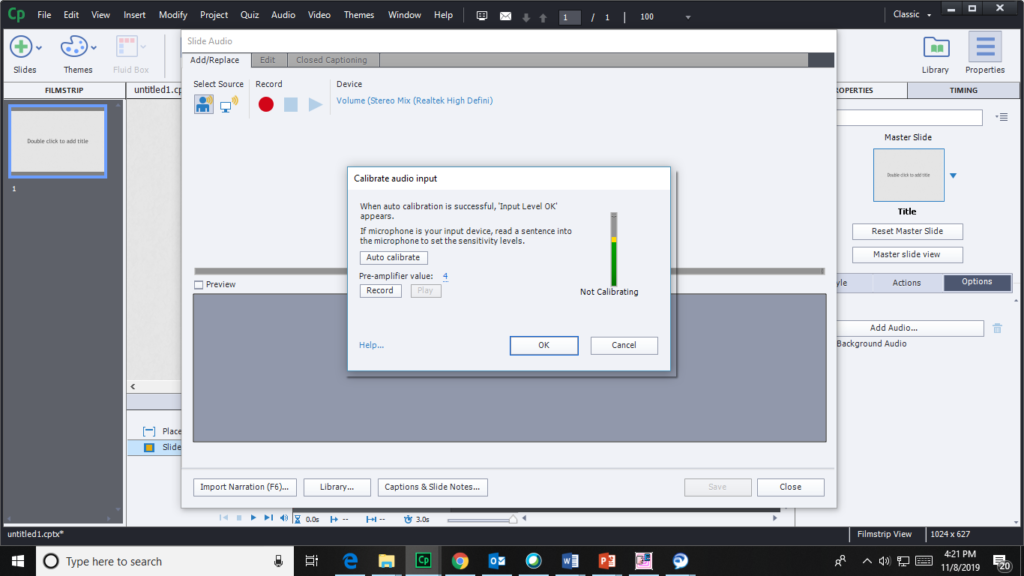
- Click on Audio Calibrate and read the default sentence given. It gives a pre amplifier and then click
- Then it starts recording the voice. Please start reading your script or content which is required. After reading everything you needed, click on the Stop
- These opens an Audio window which shows a wave format of your voice recorded. Edit the record using the tools available there.
- Click You can find the recorded audio in the Timeline window at bottom.
Let’s see how to record the voice for an object in the slide.
- Select the required object from the slide.
- Click on the Record icon which is located at the top of the tool.
- It opens an Object Audio window.
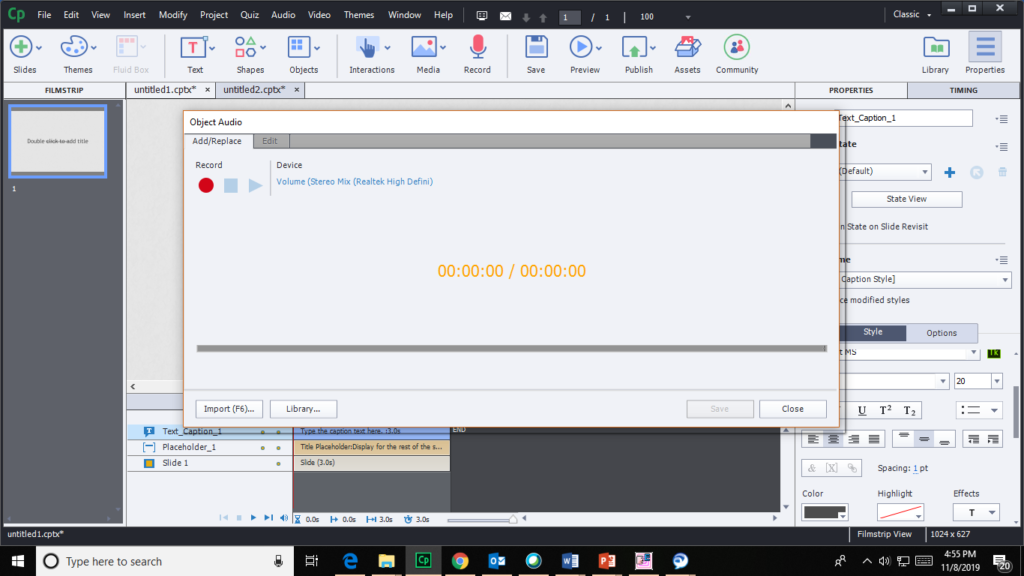
- Click on the Record . Then, look for the calibration and follow the same procedure mentioned above.
- Record your voice and click OK
- You can edit the audio as required by using editing tools.
- You can preview the voice. To preview click on the Play button
- You can find it in the Timeline as an item.