Adding Image
Adobe Captivate offers you to add images in different kinds of formats. Let’s see how to add images to your project-
- To add an image to your slide, select the required slide to add an image.
- Go to the Media menu and select Image.
- From the Open window, browse the required image and click Open.
- Image is added to the required slide. This image adds to the library.
To resize the image, select the handles of the image and drag them for the required size. You can also edit the image.
- To edit, go to Properties menu and select Edit Image.

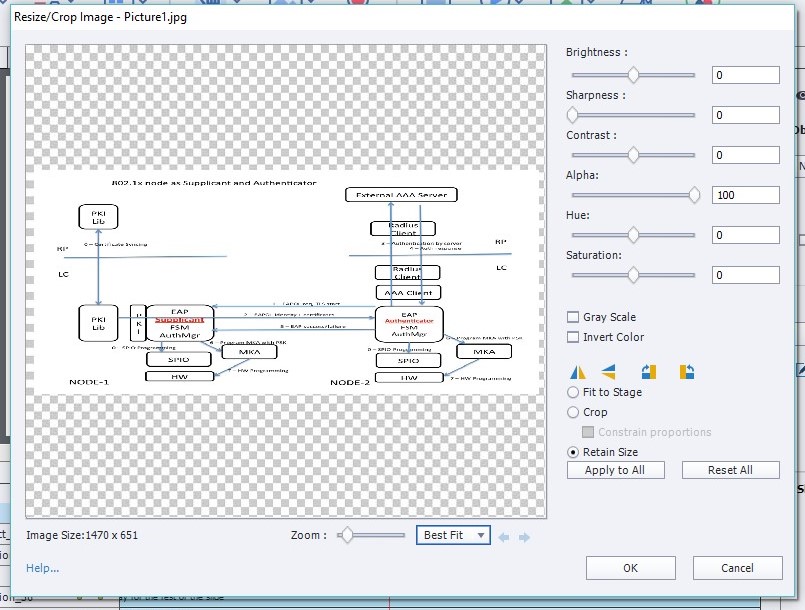
- Using Resize/Crop Image window, you can crop the image using the Crop
- You can use the Fit to Stage button to fit the image size to a stage of the slide.
- To zoom the image, use the Zoom bar to increase or decrease the zoom size
- At any time, if you feel the original size is the best fit, then you can select Retain Size option for undo.
- You can increase or decrease the Brightness, Sharpness, Contrast, Alpha, Hue, and Saturation by dragging the bar to the required value.
- Click Apply to All for applying all the changes to the image.
- Click Reset All to reset the changes applied.
- Click OK to save the changes.
If you want to delete, hide, and duplicate the added image, then right click on the image and select Delete, Hide, and Duplicate respectively.
To add audio to the image, right click on the image & select Audio > Import to and browse the audio from captivate library or PC library.
You can also record the audio to image by navigating to Audio > Record to and follow the record audio procedure.
Use the Timing tab, choose the image to display for the rest of the slide, specific time, and rest of the project.
You can also apply effect to the image using the Effects tab under the Timing tab.
Apply transitions to the image using Transitions drop-down under the Timing tab.
You can also use the Playhead in the Timeline tab to adjust the start and end time of the image in the slide.
Add Rollover Image
Let’s see how to add a rollover image to the project-
Rollover image gives an additional information or hide the information and see if required. Rollover Image consists of rollover area and image which can be associated with an object, shape or caption.
To add a Rollover Image, select the required slide and object from your Adobe Captivate project-

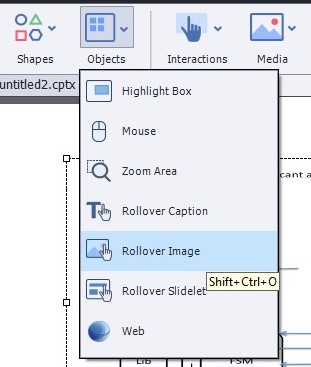
- Go to Objects menu and select Rollover Image.
- It opens a popup asking for file location. Browse the PC and select the required image that adds as a rollover image.
- Resize the image using the crop or handles of the image. Edit the image properties using Properties tab for options such as fit to stage, brightness, sharpness, hue, contrast, and Zoom.
- Adjust the size of the rollover area using handles and fit the rollover area size to object size. You can change the rollover area as transparent, using the Opacity under Properties
- Rollover the object to preview the image on the stage.
You can use the Preview > Project to see how it appears on the project.