Adding Audio to Slide
Audio plays a major role in Adobe Captivate projects. Let’s see how to add an audio to slide.
There are many options for adding an audio and will discuss all the procedures of adding an audio.
Open the Blank Project from Captivate. Let’s add only one slide to the audio because adding an audio differs by one or more slides. Let’s see the scenario where the project has only one slide.
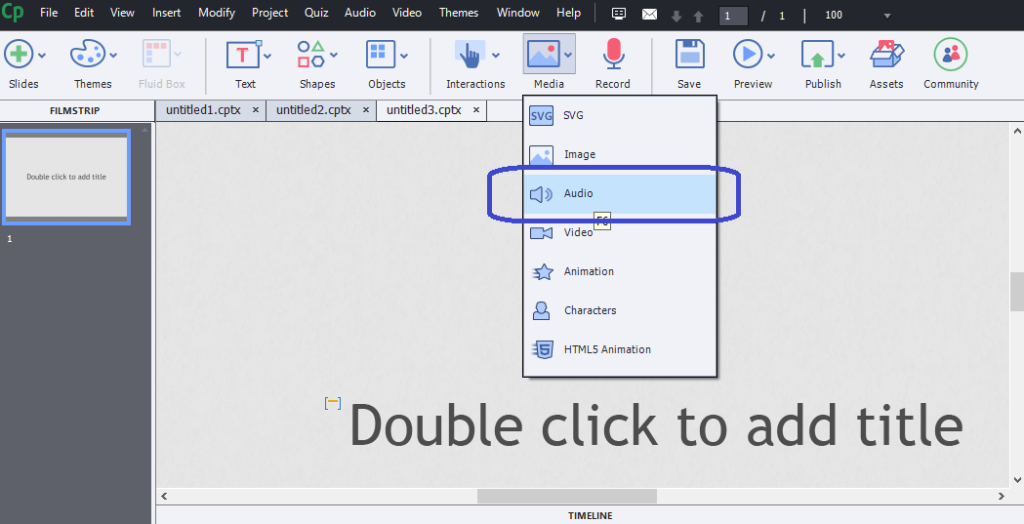
Click on the Media menu. Select the Audio from the list.

Browse the location of the audio file and click on it to add it to the project. As the project has only one slide, hence the audio is added to the slide without asking for any confirmation.
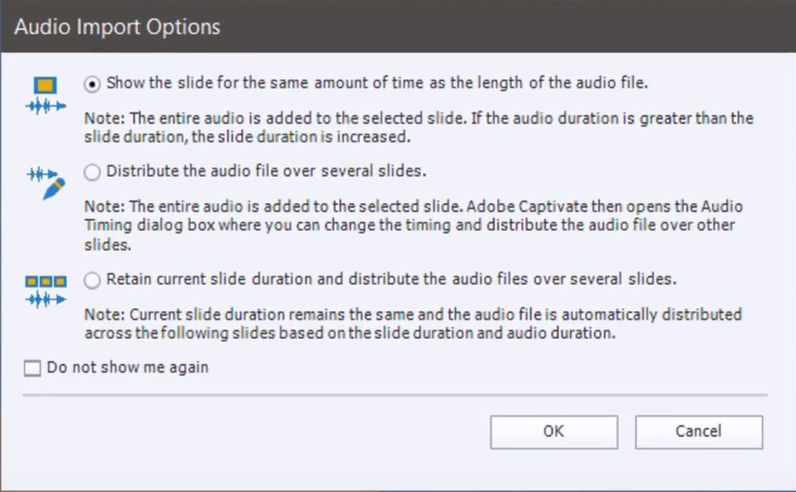
Let’s see a case where the project has two or more slides. Follow the above process to add an audio. Browse and click on the audio to add. After selecting the audio, it prompts for an Audio Import Options window.

You can find three options for adding an audio. Let’s discuss what each option does and how to use it accordingly. You can select one out of three options as per your requirement.
- If you select the first option, it allows you to add the audio for the selected slide and slide duration may increase depending on the audio duration. So, it allows you to add audio one by one to the slide.
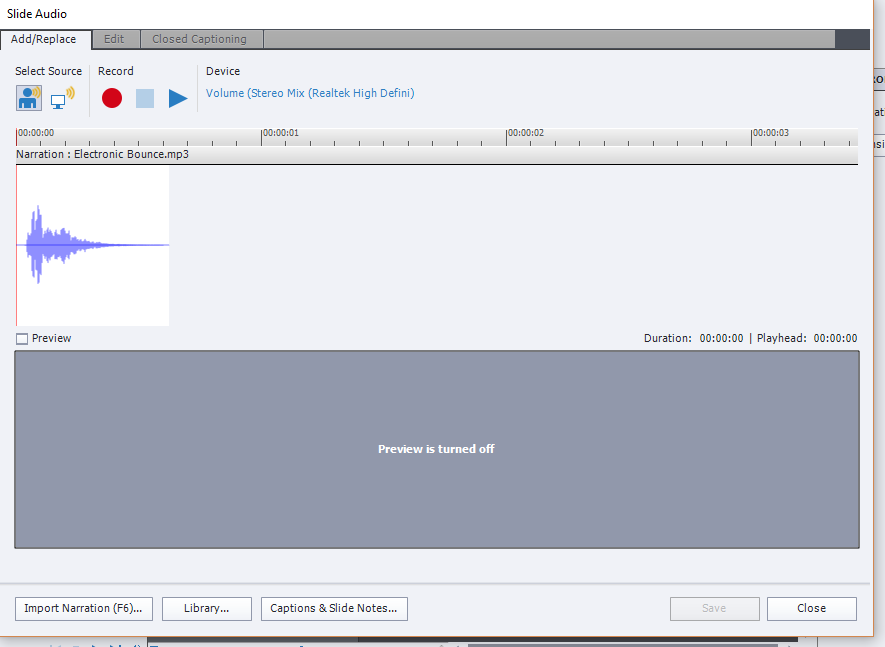
- Once you select the second option, audio is added to the selected slide and opens the Slides Audio window where you can edit the audio accordingly.

Click on the Edit tab. You can place the cursor on the wave at any second as required and select the next slide option. In this way you can divide the audio to the slides as required.
- If you select the third option, the audio is added to the slides without changing the slide duration and you can add it to multiple slides at a time with the same audio for one slide or else distributed accordingly.