Tool Customization -
Customization of tool plays a key role in completing your project with ease. It includes both the customized and default ones where you can navigate between them according to your need. Customize the workspace panels and windows by rearranging and resizing them.
Let’s see how to create a custom workspace.
Rearrangement of floating panels
When you drag a panel out of a dock into a non-blue highlighted zone, then panel floats freely in the workspace. You can move these panels anywhere in the workspace.

To make these panels or panel groups as a single unit and you can move it easily. To pileup the floating panels, click on the tab of a panel and drag it to the drop zone of another panel.
To change the order of the panels, select the panel and drag up or down in the tab. If you want to remove a panel from these group of panels, click on the tab of a panel and drag it out of the unit.
Rearrangement of the panels
- To move a panel, click on the handle of a panel and drag it to blue highlighted drop zones
- To move a panel group, click on the title bar and drag it to blue highlighted drop zones
Mouse pointer highlights the drop zone accordingly rather than the position of a panel.
- Press Control for windows and command for mac while dragging a panel to overcome the docking. Also, press Esc to cancel the operation at any time
Panel resizing
- To increase or decrease the size of the panel, panel group, click on the empty space next to tab or double click on the tab
- To resize the panel or panel group, click on the handle of the tab and drag it to the required size
Panel docking and undocking
A dock is a collection of a group of panels displayed in a vertical orientation generally. If you move panels out of the dock, panels are undocked and if you move them in, panels are docked.
- To dock or undock the panels, click on the tab and drag it into or out of the dock
- To dock or undock the panel group, click on the title bar and drag it into or out of the dock
- To increase or decrease the size of the panel, click on the handle of the tab and drag it to the required size
Rearrangement of project tabs
What are project tabs?
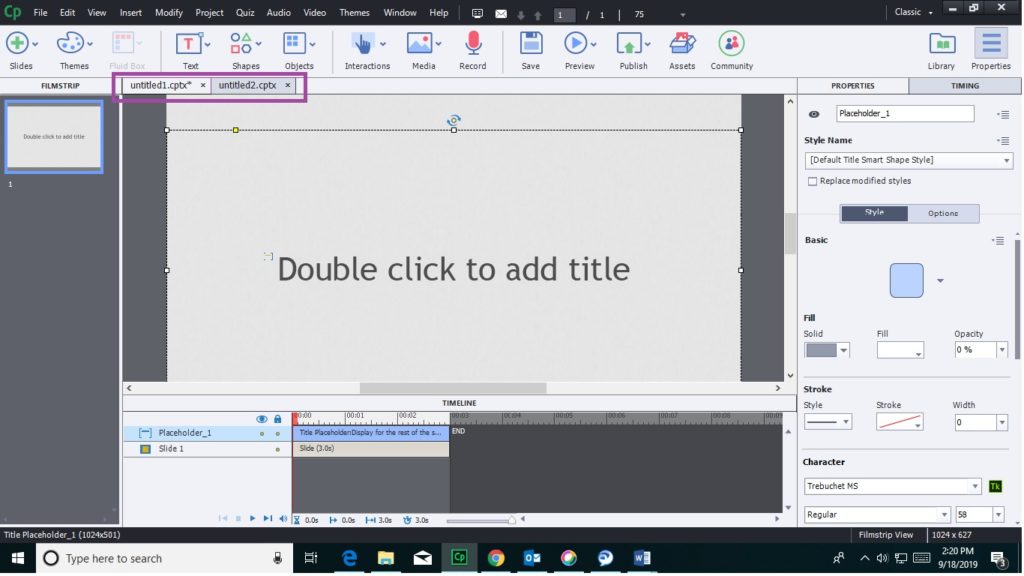
They are created when you open two or more projects at a time. When you open two projects at a time, they are opened as two tabs in the captivate project like the tabs opened in the browser.
Please see below Figure to get an idea, how this looks.
To rearrange the tabbed windows according to your requirement, select the required tab and drag it to the required new location.
How to rename and delete workspaces
Go to Window. Select Workspace. Click on the Manage Workspace. Select the workspace required to rename and click Rename. Select the workspace required to delete and click Delete.
Now, let’s see how to save a workspace.
Navigate to Window. Select Workspace from listed menu. Then, select the Manage workspace. Give the required name for the workspace in the dialog box and click OK. To revert workspace to default workspace, select Window and then select Workspace. Click on the Reset.
You can also switch between workspaces, using the Workspace switcher from the Application bar.
You will understand all these as you progress.
Bonus Tips
Advanced options are useful in customization of Adobe captivate. Reuse the advanced options across projects, slides, etc and share with others to help them as well.