Note:
To check your current IP address type “My IP” in Google.
Sometimes you want to limit access site from visitors who are logged in or accessing the site from a set of specified IP addresses.
For this case, the Restricted Site Access Plugin is very useful for your website.
Before proceeding, first of all, let us understand why we restrict our site.
So, Why we restrict access to the WordPress site?
We restrict site access to limit the access of site to visitors who are logged in. You can restrict your site by 2 methods.
- By Plugins.
- By coding.
If you are experienced and do not want to install plugins, then you can do by coding also. But for beginners, it is always advisable to do by Plugins only.
Steps to restrict WordPress site access by IP address using a plugin.
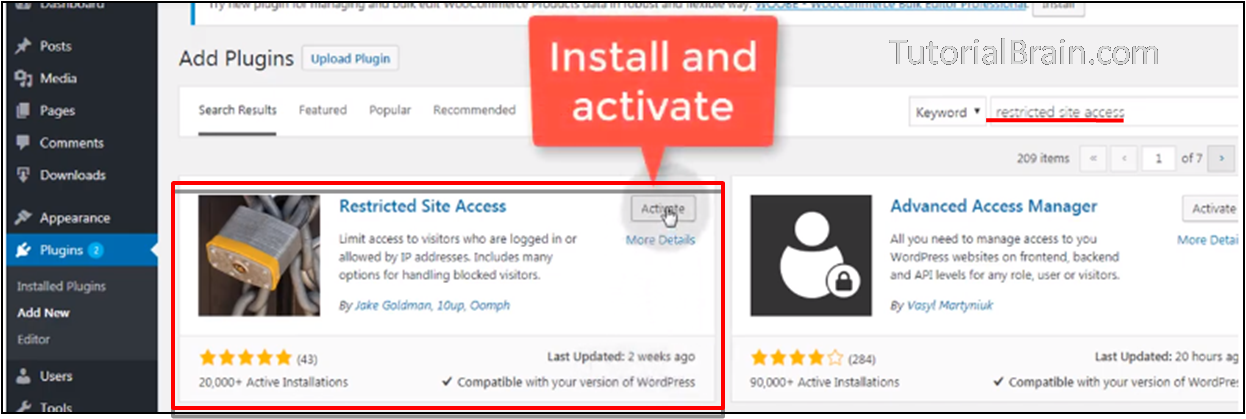
Restricted Site Access is a Plugin used to restrict site.
This plugin is very useful for beta testing of the website before you launch your product.
Now, we will see steps to install the Plugin.
Step1– Go to Dashboard > Plugins > Add new > Install Now.

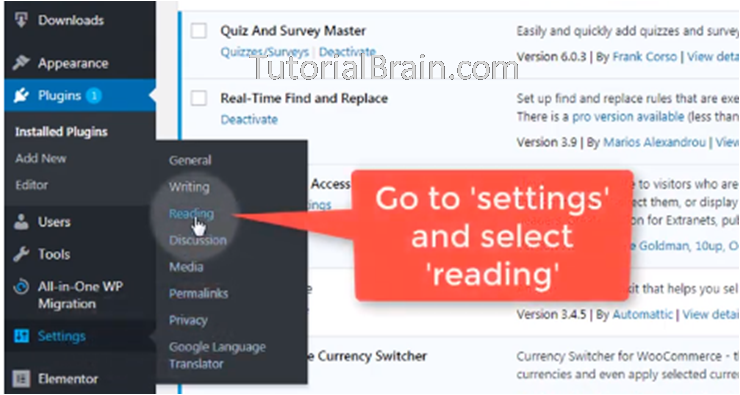
Step2 – Then, navigate to Settings > Reading –

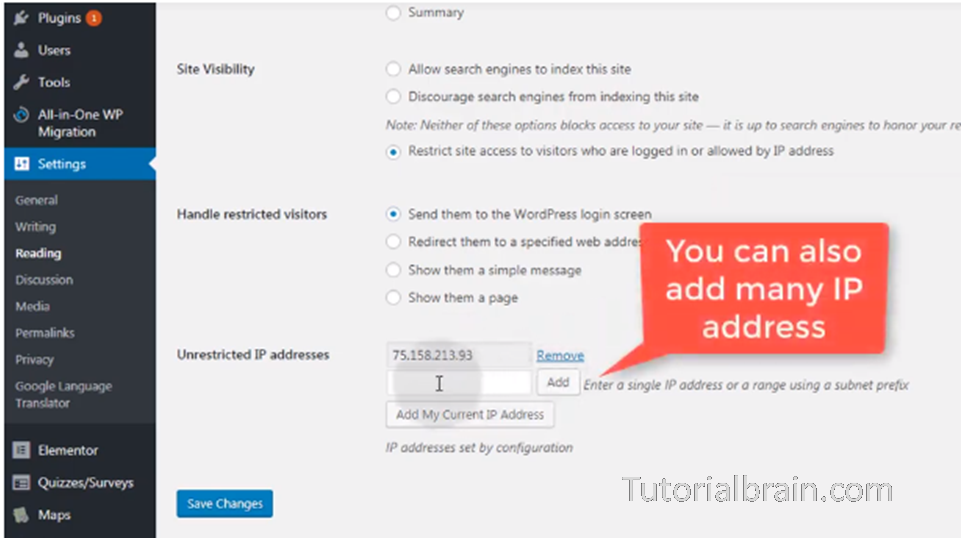
Step3 – Give the IP address in “unrestricted IP address” section and click on ADD.

You can add more IP address by clicking on the ADD button.
So, this is how you can restrict IP address to access your WordPress site by the plugin.
Another way to achieve this is through custom Coding. Let us see how –
Steps to restrict WordPress site access by IP address with Coding
Copy and Paste the code given below to your WordPress .htaccess file and save it.
IfModule mod_rewrite.c>
RewriteEngine on
 RewriteCond %{REQUEST_URI} ^(.*)?wp-
login\.php(.*)$ [OR]
RewriteCond %{REQUEST_URI} ^(.*)?wp-admin$
RewriteCond %{REMOTE_ADDR} !^IP_ADDRESS_ONE$
 RewriteCond %{REMOTE_ADDR} !^IP_ADDRESS_TWO$
RewriteRule ^(.*)$ - [R=403,L]
 </IfModule>
This code will restrict your website from IP address. You can also add more IP address which you want to restrict.